Planet Matte Paintings

The matte painting challenge is going well. Today I'm going to start looking through all of the matte paintings and find a few to use for the different shots in the sequence. Once we have a few that work, I'll start comping in the background and finishing the rest of the shots. Keep up the great work, I think we'll definitely do more of these in the future! Maybe the next one will be a matte painting in the future... Yes!!

Keep going, the challenge ends June 15th!

POSTED:
13 years ago
Video Copilot Website Update!

Today we updated our website with a slightly new look and layout. Our goal was to focus the content of the site and make it easy to see the stuff you want. We are also releasing a few products this year and we spent some time rebuilding our customer download system to make downloading products faster and easier. The new account system keeps track of your products so you can download anytime, anywhere. News about those products will be forthcoming soon but we need to get all the systems in place first. Stand by as we tweak the site and get the bugs out.

My favorite change is probably the wider blog space so the images and video can really stand out!

POSTED:
13 years ago
Overgrown Bonus Tutorial!

Last Friday I posted a new tutorial called The Jungle where we created a chipped title along with a detailed jungle scene. Today, using the basic idea, I added some CC Hair effects to create some overgrown bits of grass. What's cool about the technique is the grass bits grow out of the chipped parts of the text and the entire process is 100% procedural so you can change the title at any time. Check out the short tutorial now!

Watch the Bonus Tutorial
Download the Project (CS5+)

POSTED:
13 years ago
New Tutorial: The Jungle

In this refreshing new tutorial we'll create an overgrown jungle scene with a rocky title using images and built-in effects. There is also a mini-Photoshop tutorial about extracting plants from images.

Watch Tutorial

POSTED:
13 years ago
Z-Depth Compositing

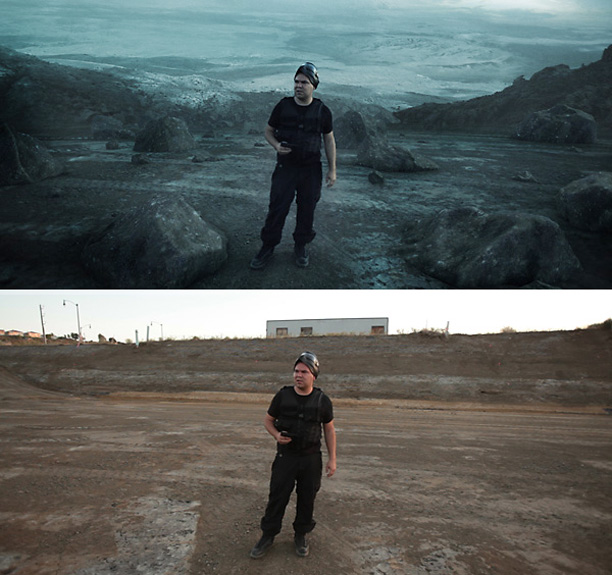
Integrating stock footage with 3D renders can help sell the realism of otherwise plain 3D rendering but compositing 2D stock footage with 3D renders can be challenging. Especially when you want 2D Elements like fire or smoke to exist in the same space as the 3D renders instead of simply comping them on top or behind.

Depth Compositing is one answer that allows you to control where 2D objects appear in the depth of your 3D rendering. Basically this method allows parts of your 3D render to be in front and behind your 2D Footage.

Does this even make sense? Just watch the video, it's got Sam in it and a parking garage! One of them charges quarters for every 15 minutes and the was free!

The 3D was created in 3D Max using Rayfire. I'll be making a more detailed tutorial as well! I'm really trying to make more short tutorials like this so people can get to helpful tips fast!

NOTE: Z-Passes can be generated automatically in a 3D Program when rendering.

POSTED:
13 years ago