Jetstrike Render Breakdown!

I think the Aviator was on TV this weekend so I was inspired to make this image and here is a little breakdown:

BREAKDOWN:

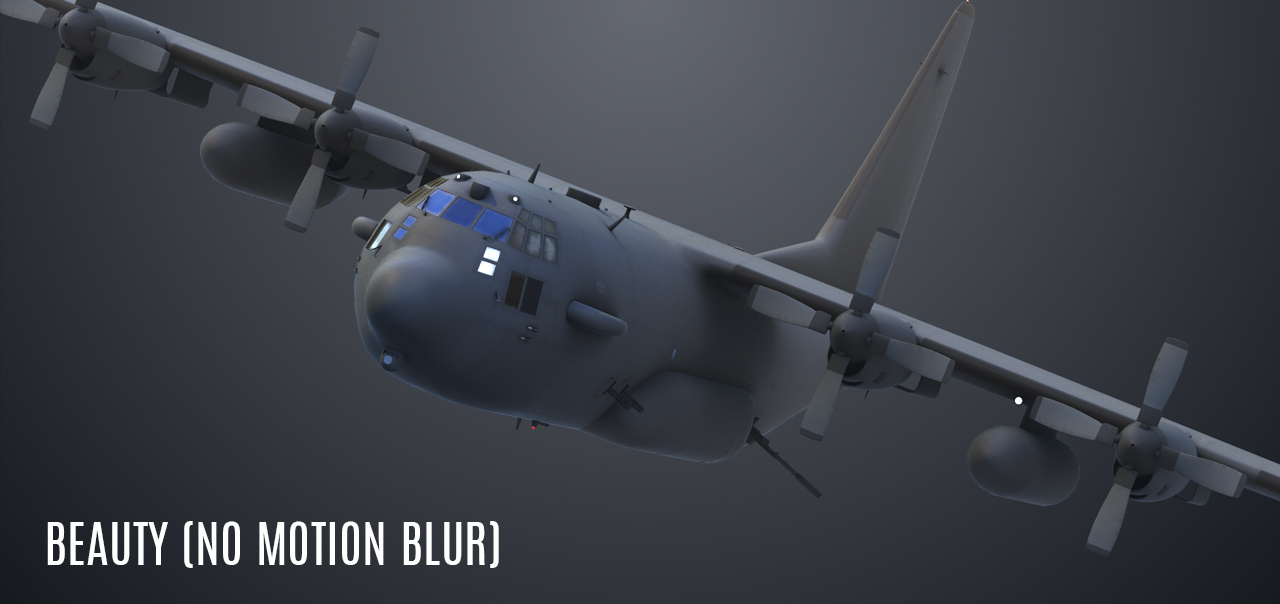
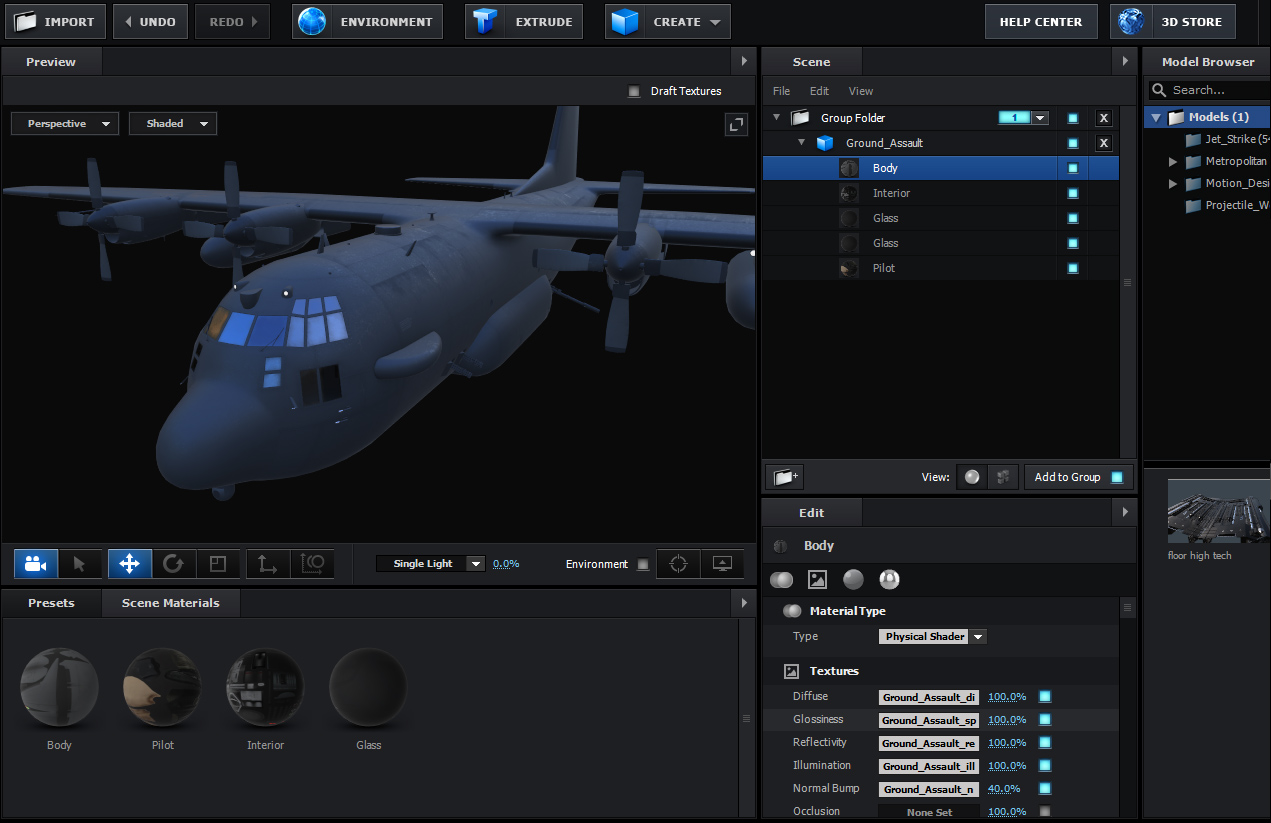
  1. First thing I did was load this model from the Jetstrike collection and convert the materials to a physical shaders.
  2. I was going to just place the ship over a cloud background but I noticed it looked like the aircraft was emerging through the clouds so...
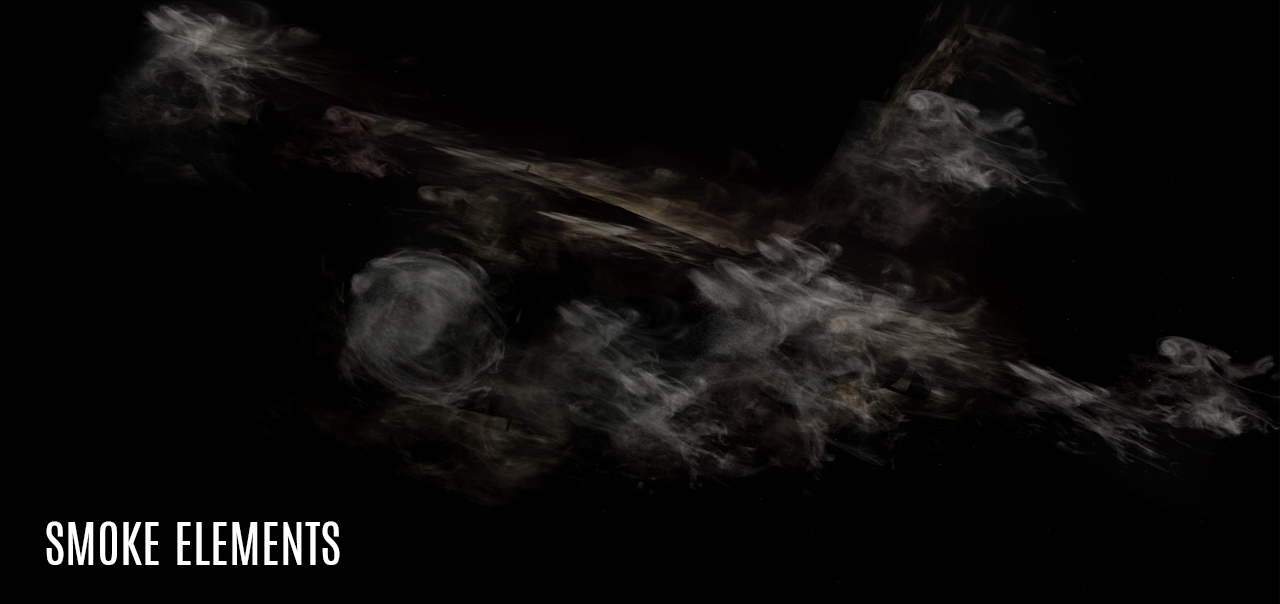
  3. I took some dust stock footage and placed it around the craft with Mesh warping. Making sure to put some in front and behind.
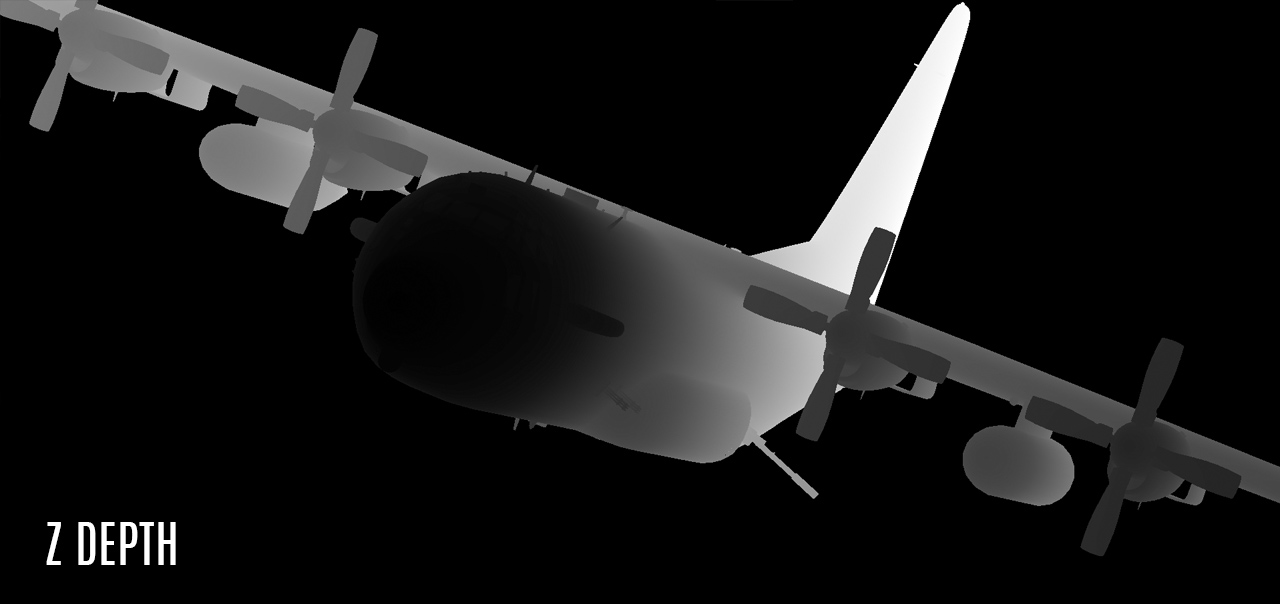
  4. I used a Z-Depth pass to blend the ship into the cloud layer.
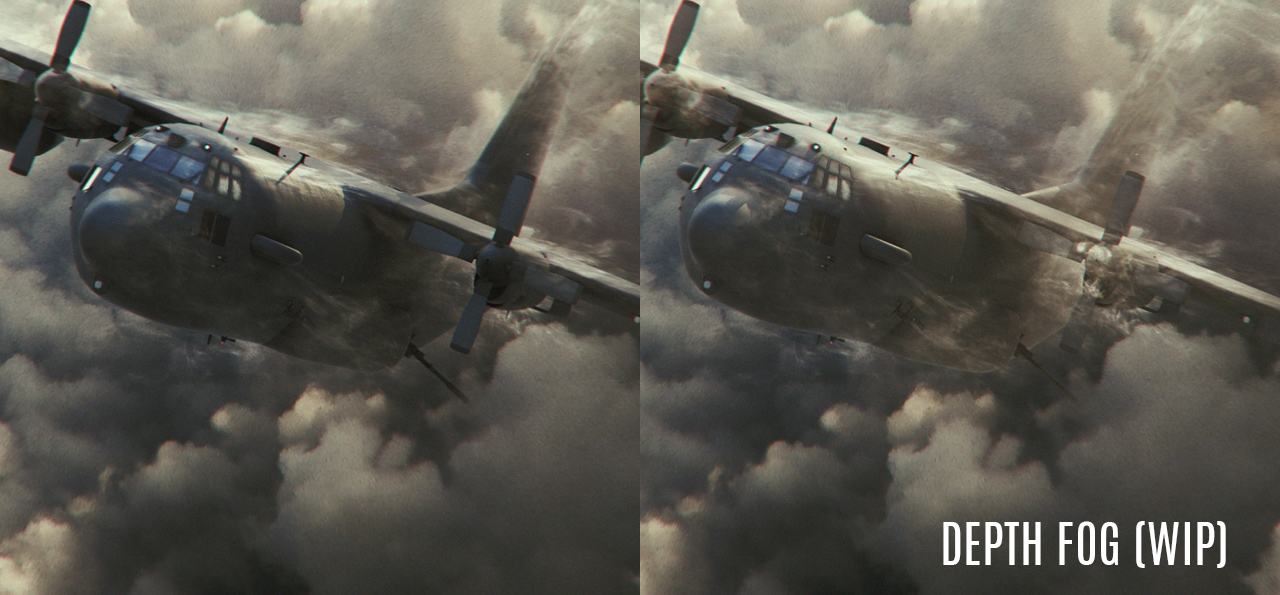
  5. As a final touch I added some fog to the render to simulate mist.
  6. For motion blur I animated the Turbines with the Jetstrike Rig controls with some additional radial blur.

POSTED:
9 years ago
59 Comments
tank you.
goood.
baraka mchaka
9 years ago
your tutorials are so great, thank for sharing to public
Divyank
9 years ago
A tutorial would be helpful, if you can please. I can't do just by reading. Sorry and thanks.
9 years ago
Hi Andrew, though I have had element 3D for quite a while now, using it to composite is still a little foreign to me. If possible could you do a video where you describe how to create z depth. I'm sure you probably already have and its a simple check box in element. But if you could refresh my memory.

Thank you for your time VC team!
9 years ago
Amazing, how to create smoke elements?
9 years ago
Just rendered out a Battleship in New York VFX breakdown! It's basically deliveroo with ultra protection...

Enjoy - https://www.youtube.com/watch?v=ww_Jg5B7GTE

VFX Breakdown coming soon!
www.nkfilms.co.uk
9 years ago
Video tutorial would be great if it's possible. You've achieved very impressing look with Element 3D .
9 years ago
awesome work andrew...glad to see that you are not posting tutorial.
check out my work which is related to this
unfortunatly i cant reach andrews level but its pretty good
http://www.techmers.in/2016/09/jetstrike-render-challenging-to-andrew.html
ThomasO
9 years ago
Way cool and great inspiration as always! Like the breakdown and the additional elements. I'll have to read up on the Z-Depth pass.
Bao
9 years ago
Awesome!!!
ryan johnson
9 years ago
Sir AK/VC Team:

Was that your ground assault jet model they used in the opening credits of the "Night Manager (2016)?!!"
ryu
9 years ago
camer used?? i mean camera lens millimeter??
9 years ago
What a great shot Andrew!
It's really impressive!


Digiphic Studio
http://www.digiphic.com
JC Brown
9 years ago
this is awesome. Thanks for explaining
karthick
9 years ago
how to use mesh wrap tool
George Laird
9 years ago
hope this a tutorial idea in the pipeline, it look great as always coming from Andrew, even if it is a short one!
Ratra
9 years ago
The Smoke Element is that unique AK's touch, making this render look so much more awesome!
David Vizurant
9 years ago
Like this kind of breakdown, it is like a short tutorial
Oleg
9 years ago
Thank you very ... Cool work!
Jason W
9 years ago
Honestly Andrew, things like these are great for more advanced users that can figure out how to do these things without a tutorial but, just to look at compositing from additional perspectives. Even if you just created the blog posts in that way would be great. I know there is so much effort on behalf of you and the team to get a multitude of projects finished so We appreciate whatever you share with us at the table. Thank you VCP.
lovelysoul
9 years ago
thank you andrew kramer
lovelysoul
9 years ago
Chris
9 years ago
ok we need a tutorial, I'm one of those stupid people that can't learn by reading and seeing a few pics.
Jason W
9 years ago
@ Chris: The good news is you don't have to!! If you go back and look at the z depth pass tutorial with the falling support or, the train car explosion, they cover the basics of how it was done. When you start combining all of these awesome tutorials is when the magic happens...That my friend, is the essence of VCP!! Good luck!
Anh Huyen Nguyen
9 years ago
JamesGodfrey
9 years ago
Genius!
Joseph
9 years ago
The warped dust is a great idea and really nice effect!
Micheal Malcolm
9 years ago
Awesome!!!!
Mike
9 years ago
Do you use twitch for Chromatic Aberration?
Owen Walters
9 years ago
I can't imagine. Twitch is, by it's own nature, a little too hard to control to be reliably used for chromatic aberration simulation
Kevin
9 years ago
Mike
9 years ago
Thanks,
I found this for 15 bucks, http://aescripts.com/efx-chromatic-aberration/
StevenJ
9 years ago
There are many ways to accomplish this in After Effects. I'm just curious what ANDREW's method is Just curious. And frankly it's driving me crazy wondering. I should see a doctor or something.
9 years ago
Amazing! So happy to see Video Copilot on the road again!

By the way, what's the meaning of "WIP" on the Depth Fog picture?
pinktop
9 years ago
it means 'work in progress'.. BUT..if youre talking about inception..its 'working is postponed'..
Joseph
9 years ago
WIP usually means Work In Progress.
El Guapo
9 years ago
Wow, that's a fantastic looking shot. These little blog posts always inspire me with new perspective with Element. Thanks and please keep em coming. Cheers.
9 years ago
3D element + matte painting
https://www.youtube.com/watch?v=yhrYL7UflyM
Biere
9 years ago
I would LOVE to watch a full in-depth tutorial of this!
9 years ago
Muito Bacana Andrew. Element 3D mudou a cena do After Effects.
https://www.youtube.com/watch?v=8ysKNcfCfR8
John
9 years ago
Funny... the part of this I thought was MOST fake looking was the background, and as it turns out, it's the only real part.
9 years ago
Thanks for sharing things like this! We need more "tutorials" like this
jeroen
9 years ago
Hi!

Looks great! Wy did you use the z-depth pass and not the world positioning pass?
BrotifyPacha
9 years ago
World position pass is useful when your camera is moving a lot, but since it's a picture you don't realy need to use it. Or if it's not a pic, then i guess camera doesn't move that much.
jeroen
9 years ago
Hi!

Looks great! Wy did you use the z-pass detph and not the world positioning pass?
Israel2099
9 years ago
Very useful Mr Kramer. Actually i'm making a Short film all made in Element 3D with OBJ Sequences, this will be very useful
mani
9 years ago
hi ak we can use w-pass for depth fog ?
sam koreyah
9 years ago
WOOOOOOW!!!!!!!!!
mani
9 years ago
HI AK tanx Man , what is somke elements its plugin r presets?
9 years ago
Mesh warp means you applied the Dust & Smoke Elements to the Airplane model slots ?
StevenJ
9 years ago
Mr. Kramer, thanks for the share! I was wondering if you could break down the step of converting to physical textures. Do you tweak any of the "channels" such as glossiness or reflectivity gamma, contrast, etc.? Or do you just "flip the switch?"

Thanks!
9 years ago
I do indeed tweak the maps and shader settings. The gloss map in particular in order to get the right surface look.
Redo
9 years ago
https://www.youtube.com/watch?v=KKQZN3eoKUo

This might help. It covers the PBR Albedo mostly. When you download the pbr range chart however, you will find the reflectivity and microsurface values for various nature elements too. All best !
Kai
9 years ago
Very nice render as always, also like many others I would like to know how you managed to create realistic chromatic aberration
zedul
9 years ago
Nice experiment and sharing...
David Robillard
9 years ago
Awesome Andrew thanks for sharing your workflow.
Usman Ellahi
9 years ago
Sir you used Z pass directly inside Element 3D or rendered it through 3ds max etc?
Joel
9 years ago
nice WIP on the smoke I wonder if particular could have been used with this method to create the trails I guess to get a real push through the clouds you would need to use a real smoke sim like turbulence fd or another. Still can't believe this is all done in AE you really make it look easy well done
Gonzalo
9 years ago
Nice Job, is this 3D model on Jetstrike?
Usman Elllahi
9 years ago
yes
Donnell
9 years ago
Andrew I did the exact same thing you did to try to re create what you did..except I made a mask around my model then added the saber plugin then added radial blur to that. Thank you for pushing us to be creative with these weekend renders
StevenJ
9 years ago
I second that! I really enjoy trying to emulate the looks we're seeing with these renders. It pushes me to learn and tweak and try new things. I think it's great to see what is possible with this plugin, and then learn how to do it the best we can!
Anderson
9 years ago
ok, now make it explode!!! ha!
9 years ago
great job but too easy.
We are expecting more than this one by you.
Regards!
GetOuttaHere
9 years ago
Andrew is not sitting there trying to fulfill your expectations. He owes you nothing.

If you can read, you will notice that there are tons of positive comments here.

You don't like what you see? Get outta here, a******.

StevenJ
9 years ago
Take it easy I think Tural is just being playful. I think it's more than obvious to anyone that this is not an "easy" composite.
Hijazi
9 years ago
You intrigued me to see your skills. I only see your talking here too easy.
Steve Buscemi
9 years ago
Great job Andrew ! But we need more tutorials pls make some about rendering like this
9 years ago
I'm your big fan andrew!!!
Everyone knows you here.!
LOVE FROM INDIA.
9 years ago
so nice
great job
we are waiting for action essentials 4k xD
9 years ago
Thank you Andrew!
9 years ago
Really interesting process Andrew! Love the smoke elements with depth fog, it really sells the emerging plane out of the clouds effect.

AWESOME!
9 years ago
wooouw love it