VIDEO COPILOT BLOG
News, Updates, Projects Files & Tips


New Tutorial: Advanced Camera Tips

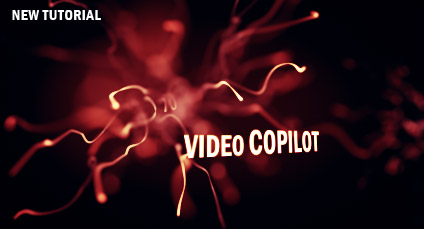
In this tutorial we are going to take a look at advanced animation techniques for with precise camera control.. I also use Particular to create a cool scene object.

Watch Tutorial
See Sample Video

Last chance before holiday!
It’s getting closer to the holidays so don’t forget to buy yourself something from our Online Store :) You deserve it!

62 RESPONSES TO “New Tutorial: Advanced Camera Tips”

So sweet.. !

Christmas comes early this year i see :)

Cool this new tutorial

thank you

Awesome! Gonna check it out right away. Check your site every day for updates, tips and tutorials and it´s like christmas every time I see a new tutorial posted or some great tips in the blog from you!

You´re the man Andrew!!

This stuff is pretty much awesome, makes me with I was a maker of some cool video or something!

Taste. :)

YES! I think this is one the one that most have been waiting for. I know I have, although I have recently built myself a “rig” out of several parented nulls, controlling the rotation and tilt with expression controls. I’ve seen where people use sliders for this kind of thing, but i find it a bit more intuitive to use the Angle control.

Anyway, I’m sure your techniques are more efficient or offer more control somehow. Thanks again for everything you do for us!

A.K. my hero \o/

Excellent as always. This look is really popular right now, and it’s great to see your approach. This sort of thing really helps give punch to promos, etc.

what about the “BRIDGE TUTORIAL” that would be a NICE CHRISTMAS GIFT !! for us.

have a nice day!

hey. i’m watching your great tutorials and sorry it’s the first time i leave a comment xD. just to say keep doing that super work, so helpful and really useful tutorials.
thanks for your time given ;)
bye

the scene is lookin pretty cool! im going to watch it…

by morten enoksen

Andrew, the sample does not work! Fix the link!

Thank you teacher!! You ´re the one! Did you know that??

Morten the link does work just right clicks and save target as and then open it with Videolan or you preferred m2v player

Hey Andrew or anyone out there… When you add the camera shake with the wiggle expression, is the default set to “smooth” or “jagged” and how can you change that in the expression (if that’s at all possible)?

Thanks!

Paul Del Vecchio

oh I forget thanks Andrew great job , but I am still waiting for the new Andrew Jones movie

cheers

Fox

Thanks, I do deserve it. i also deserve TWITCH!!!

Awesome i`ve been waiting for new tutorial so long i checked the site 3-4 times a day and i`m sooo happy now i love you man great tutorial as usual keep up the good work make us happy with some more tutorials for christmas and the new year and don`t forget take a rest and spend the holidays with your family and friends ;)

by morten enoksen

What? Are you removing the holiday tut? Well well.. You got a family to take care of..

Great tutorial man! The one I have been waiting for but it is so hard on my system to render it makes it really hard to work on but still A++

one of your best, love it

Great tutorial Andrew, i only can say thanks, i still here from spain to learm from the best, of course please excuse my english, you know i speak spanish, so, i´ll trying.

I have to say that that tutorial will come in handy when I work in 3D space next time.

Keep up the good work Andrew.

Now I am off to buy Evolution.

im taking my hat off. Great one once again Andrew. These tutorials of yours are more than tutorials, they´re inspiration.
Greetings from Germany

Asome tutorials, some very useful tips
Thanks Andrew!!:P

how much does this help me? ALOT!!!! thank u so much, ever since u put that “promo breakdown” page up ive been working to make my own cool 3D world scenes, this has helped me a ton. thanks you so much, u got some sweet tips in there.

that’s great!tons of things i need to know to finish the work i’m on…thanksthanksthanksthanks!!:) btw don’t work too much in these holidays!

Lovin’ that this site isnt just about blowing your head off or animating critters underneath your skin. I like seeing this lessons on camera movement.

ANDREW HAVE YOU EVER USE “Autodesk Combustion” MANY PEOPLE SAY IT’S BETTER THAN AFTER EFFECTS =D

sorry for the caps.

Thanks I’ve had so much problems animating the camera in such type of scenes.

OMG, very useful tips, thanks Andrew…… :)

Will you marry me, Andrew Kramer!!!

Lord and Master once again you make our video creativity ever expanding and more complete.
No other designer is giving us the tools to make us one man islands in video production as many of our clients expect us to be.
I have been a loyal follower I have been bought several of your products, and with my own artistic touch I make sure to amaze my clients and push my talents to the limits.

nice andrew you are the man buddy…! ;)

waiting for your new tutorials of max….

from Pakistan

Great Andrew!
This is like a DVD menu! :D
Btw it would be cool if you made a tutorial on how to do a DVD menu in AE (if it is possible in AE) or another program, like SONY DVD Architect or some other program.

//Alex

Heh, your “organic” sound effects for the swooshes sounded like Transformer sound effects! Nice tutorial, put quite a few things into, ahem, focus.

These tutorials are just what I need. You explain them well and interestingly and I can’t tell you how much I appreciate you breaking everything down for us.

I was going to ask, have you seen Digital Juice’s DJTV show called Suite Effects? This could be old news (I haven’t kept up well on this blog) butI think his intro pays homage to just about every tutorial you’ve done. And I saw an advertisement for their show in either Videomaker or Studio Weekly I forget which in which his head is exploding…quite like how you made the planet explode. But that ad was probably created a week or two before that tutorial came out…I still find it interesting…

Thats another one fantastic tutorial, but i have only one thing to say… You need to think there are too much people who have After Effects without extra plugins like Particle from Trapcode… (its only a comment) Thanks Andrew Kramer for sharing your knowledge… :-)

Andrew,

Great Tutorial and great point about camera control!! Your tutorials have been a tremendous help in learning my way around AE’s interface (whatever the version). Thanks for all your hard work!

Side note:
I’m working on an older version of AE (6.5) and the Separate XYZ preset isn’t showing up. It seems I could easily recreate it with three slider controls, but I can’t quite come up with the expression to isolate the individual parameters.

Any thoughts anyone?

Julio

Alex : buy serious FX and compositing :P
http://www.videocopilot.net/seriousfx.html (number 8 of the tutorials)

Great tutorial!!! thanks!!

Hey Andrew where did you get the presets for Paricular or did you make them??? Because mine sure didnt come with any.

This kind of has already been covered by you Andrew…

VFX Guy: The presets for Trapcode Particular are installed with the product. If you’re presets are not there, then you might want to try re-installing with the latest version.

http://shop.sketchworkproductions.com

Andrew (Or anyone who knows here)

When outputting videos with a Radial Ramp to create a gradient how can you reduce the “steps” in the gradient. (Even with your new example video you can see what looks like rings reducing the gradient in color). Is this something you can do with adding some light noise?

Anyone know?

Respond off group to: jamesdcawley@hotmail.com

hey Andrew look at this video…
notice the little logo in the lower left corner…

http://www.emol.com/especiales/videos/index/index.asp?id=M85

this is a party in amsterdam. calles Sensation White
.. hummmm…. logo made with Evolution???
mmmm… yeah, i think so….
you are coming worldwide man…

WOW great tips….

check out the 3d camera moves in my music video… im proud of them considering they were done the hard way.

http://www.youtube.com/watch?v=IaJfTo4pN04

Happy After Effecting.

Thanks for the tutorial Mr. Kramer!

My attempt at it:
http://212.61.72.51/data/videos/randomstuff/ACA.html

again, great tutorial !!!

as always, a great explination of AE and its tools — two thumbs up!

For all those people who “think” they’ve found Evolution elements at work, you guys have yet to find one that is actually using Evo… Just because there is swirls or flourishes doesnt mean its Evolution… geeze guys, look harder. Out of the 10 or so posts with links to “evo in use”, there has NOT been one single use of the product. besides, thats why VCP made the thing, to be used commercially…

peace out

Hey, awesome tutorial AK..quick question though, the draft 3d only eliminates DOF in previews, but in my final render, the text was all blurred out with DOF. Am i the only one with that problem?

You rock man!

Seems i’ve the same problem as Raj, when I make a ram preview directly from Ak’s project, it’s perfect, but when i make a render, the text is all blurred out… What can i do ??

Be sure to read the rendering note on the tutorial page.

Ah…good call….

by Chris Florence

I have created my own version of this tutorial and the d.o.f. will not shut off for the text even when I select the Draft 3D button. What is the deal? Any thoughts?

Can any body tell….
How this effect was created…
Which software they have used…
Please tell me..
Link is :
http://rapidshare.com/files/78274487/AVSEQ02.mpeg.html

Very nice tutorial, as always! i was wondering anyway, if you could make one about “photos editing” it could be really great!
what we can do with a RAW photo or smth!

You are one awesome teacher not to mention funny and enthusiast.

Ive learned tons past 2 days watching all your tutorials and hope to be buying all the products soon.

Keep up the great work, Ive finally found the site that PUSHED me into learning AE.

Thanks!

WOW, don’t have much more to add to anything other than that lol.
Im 21, from the Netherlands and been photoshopping for about 4 years now. I got my skills from a crappy computer running PS 7.0 (with Imageready). Now that CS and CS3 came out, I lost track of Imageready which I always loved to use for animating. Untill recently Ive seen After Effects on Adobe.com. I tried it out and was a complete moron at it lol. Digging thru Google I came across some very lame vidtutorials and all untill I found VCP. Im actually a real life commercial pilot myself. But since Im just finished school this month and havent got a job yet, I decided to pass time renewing my skills. The Basic training was a real charm. Also the way it was explained, I could really relate to the program and picked things up real quick. You got a good sense of humor init as well, which I personally just love. This is definately one of the better design places on the web, so Ill guess Ill visit more often. Thanks for the tutorials and happy new year in advance.

Hey Andrew, Will U teach us to make an special FX like “supernatural” something like the black Smoke from the mouth.

Regrads!!

very cool. only one question:

the separate xyz-effect seems to be limited to 30000. Is there any possibility to change this? a usefull answer would help me a lot.

greetings from germany, uxel

Hey uxel, I know this is like 6 months after you posted that, but in case your still wondering, I have a solution. I had the same problem, working with an “outer space” composition. I was searching google for a solution, and ended up finding your post along my way. Unable to find one, I played around and figured it out myself. Just create a second null object with its own “Separate XYZ” effect and then parent the original null to the new null (and remember to have the camera parented to the first null).

Post a Comment!

Before Posting
We're trying to encourage more thoughtful commenting.  Please take a moment to write a meaningful response to this post.

Also remember to read the rules on posting first.

Leave a Comment